Video Demo
This guide will walk you through how to connect your Miro boards to Bluejay’s workflow system. You can import Miro boards as conversation workflows to visualize and evaluate your agent’s conversation paths.Quick Prerequisites
- Miro Account
- A Bluejay Account
- A Miro Board with connected nodes representing conversation flows
Setting Up the Integration
Get Your Miro API Key
Go to the Miro Development Platform and create your app:
- Navigate to https://developers.miro.com
- Create an account or log into your existing Miro account
- Create a new app by clicking “Create new app”
- In the app settings, go to the Permissions tab
-
Click the checkboxes for
boards:readandboards:writepermissions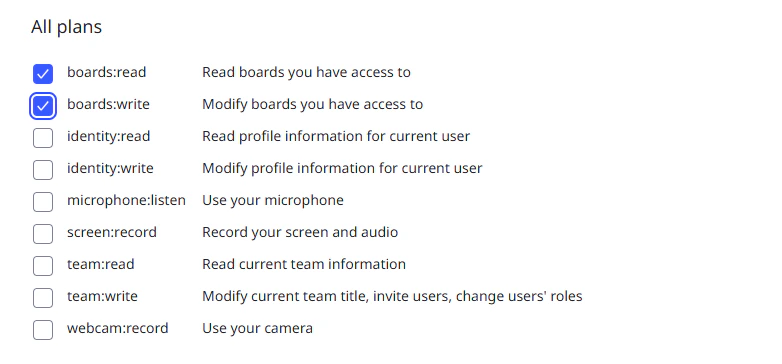
- Click “Install app and get OAuth token”
- Select a development team
- Copy the OAuth token - this is your Miro API key
Configure Bluejay Integration
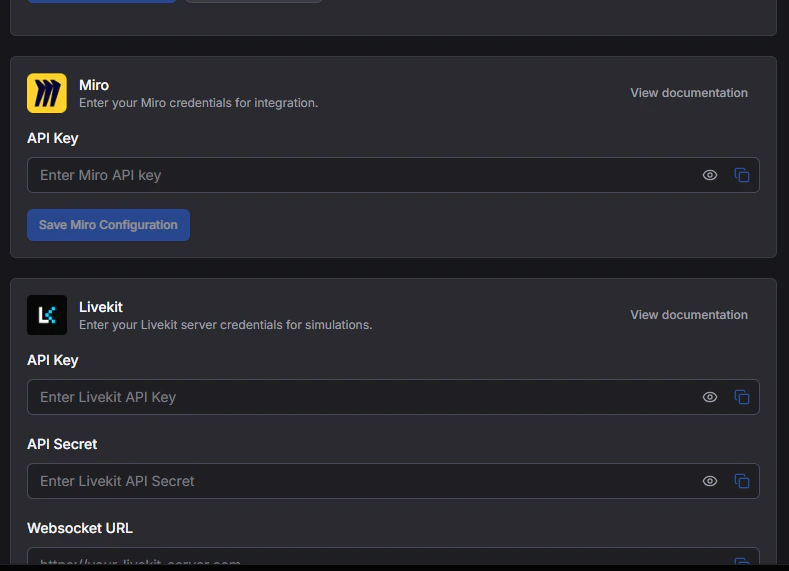
Add your Miro API key to Bluejay:
- Log into your Bluejay Dashboard
- Click on your Account button in the bottom left corner
- Select the Integrations option
- Locate the Miro API Key input field
- Paste your Miro OAuth token into the field
-
Click “Save Miro Configuration”
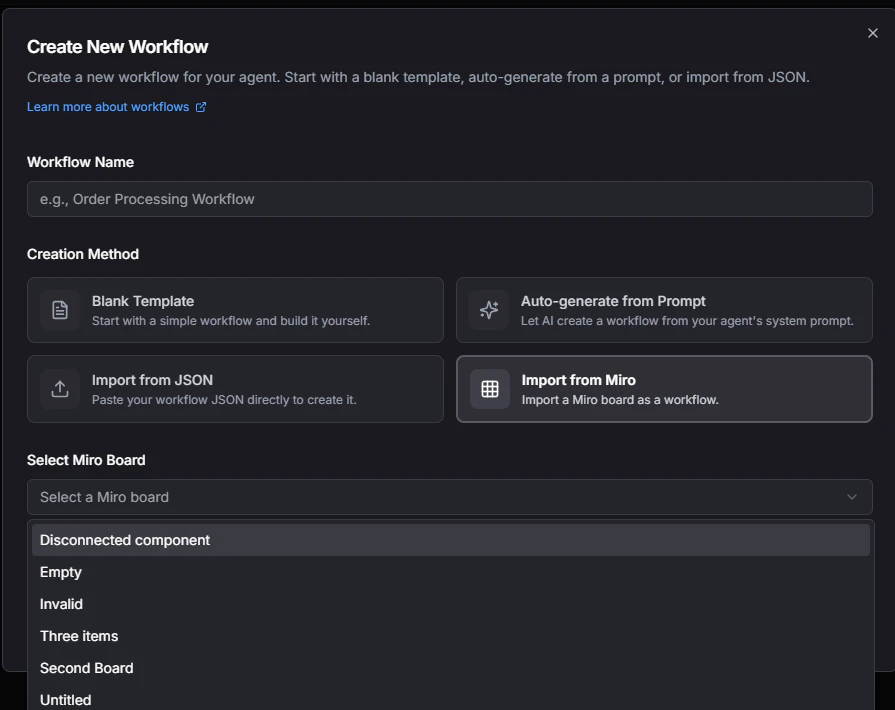
Miro Board Requirements
Your Miro board must follow these structure requirements for successful import:Connection Rules
- Exactly one start node: Only one node should have no incoming connections (arrows pointing to it)
- At least one end node: At least one node should have no outgoing connections (arrows from it)
- All nodes must be connected: Disconnected nodes will be excluded from the workflow
- No duplicate connections: Each connection between nodes must be unique
Supported Elements
- Cards, Shapes, and Sticky Notes: These will be converted to workflow nodes
- Connectors/Arrows: These will be converted to workflow edges
- Text Content: Node labels will be extracted from the text content of your Miro elements
AI-generated features and imagery are not yet supported. Only manually created cards, shapes, sticky notes, and connectors will be imported.
Node Types (Auto-detected)
- Start Node: Node with no incoming connections - represents conversation start
- End Node: Node with no outgoing connections - represents conversation end
- Editable Node: Node with both incoming and outgoing connections - represents intermediate conversation steps